Generate Minutes Using AI Option
Generate Minutes Using AI
You can use a transcript file (TXT, VTT) or an audio recording (MP3) of your meeting to automatically generate minutes with the help of AI.
Follow these steps below:
Step 1: Upload Your Audio File
- On the left-hand menu bar, click Manage.
- Select My Transcriptions.
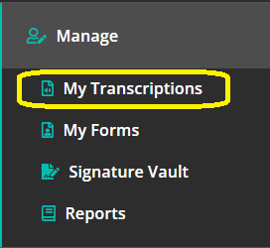
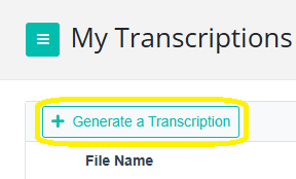
- Click Generate a Transcription.
- Click Browse (or drag and drop your file) to select an audio recording or a text transcript file (.vtt or .txt).
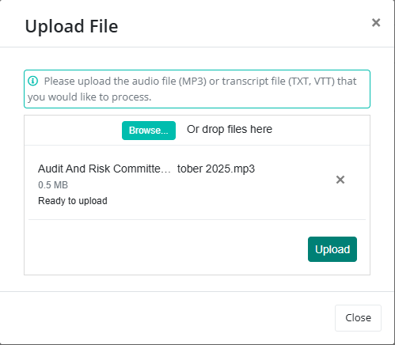
- Click Upload.
Once your audio file has been uploaded, it will automatically be transcribed into text.
Note: The transcription process takes approximately 20 minutes per hour of audio. You can continue with other activities while the file is being processed.
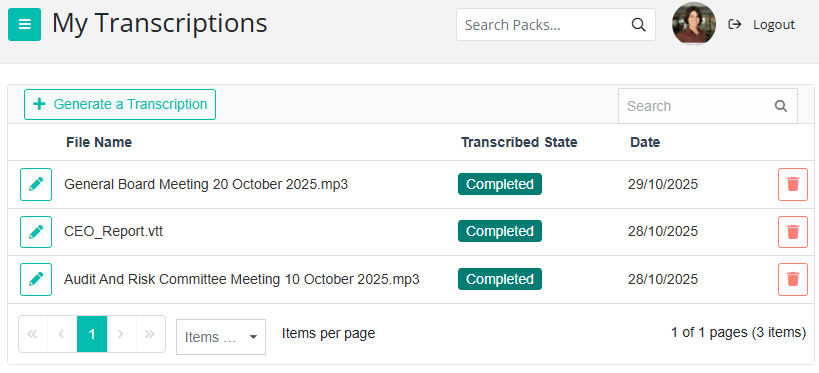
Step 2: View and Manage Your Transcriptions
After your file is transcribed, you’ll see it on the My Transcriptions Dashboard. Here you can:
-
View or edit the transcription by clicking the pencil icon.
If it is an audio file (pictured below), you can click the play button to listen to it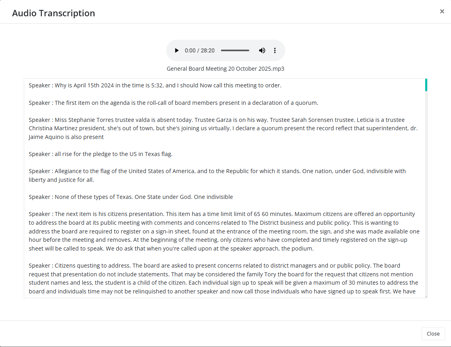
Example of a .VTT transcription snippet shown below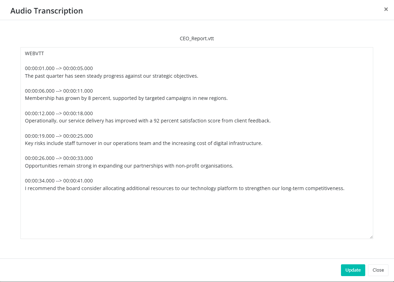
-
Check the status (Pending or Completed).

-
See the upload date, displayed after the state of the file.
-
Delete a transcription using the orange bin icon.
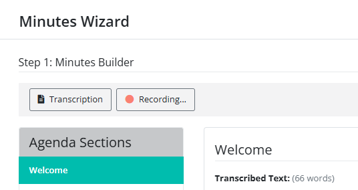
Step 3: Generate Minutes Using AI
When creating your meeting minutes, select Generate Minutes Using AI.

In the pop-up window, click the link icon (top right) to connect an audio transcription.
![]()
From the Link Audio Transcription pop-up:
- Choose the relevant transcription from the drop-down list.
- Review the displayed text to ensure it’s the correct one.
- Click Update to load it.
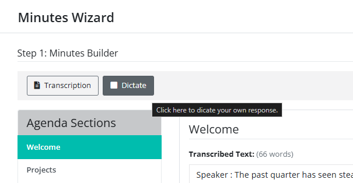
Step 4: Add Transcribed Content to Agenda Sections
- Select the Agenda Section where you want to add content.
- Click the Transcription button (top left of the pop-up, next to the Dictate button).
Note: The Transcription button will only be enabled if you have linked an audio transcription file. If no file has been selected, the button will appear disabled.
![]()
![]()
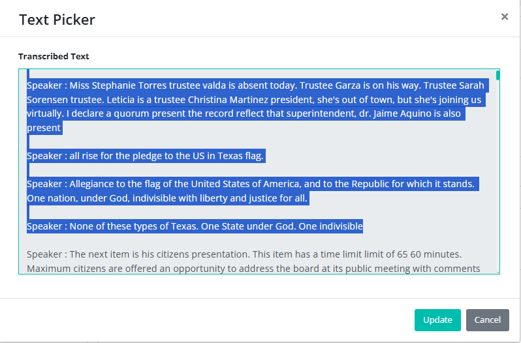
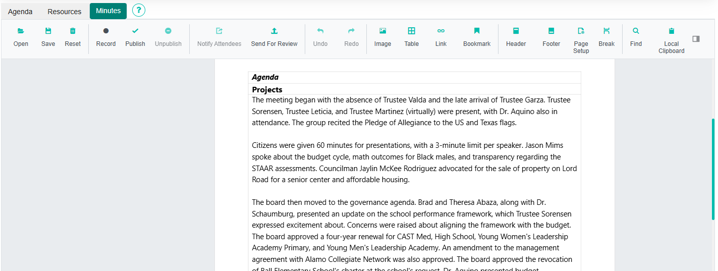
3. Highlight the section of text you want to include in your minutes.
Click Update.
Step 5: Summarize Using AI
- Use the default AI prompt: “Summarize the transcribed text as past tense.” or you can edit this prompt if you prefer.
- Click Ask AI.
The AI-generated summary will appear in the box at the bottom of the pop-up. - Review and edit the text if necessary. You can type or use voice dictation.
- Important: Tick the checkbox at the bottom to include this edited text in your minutes.
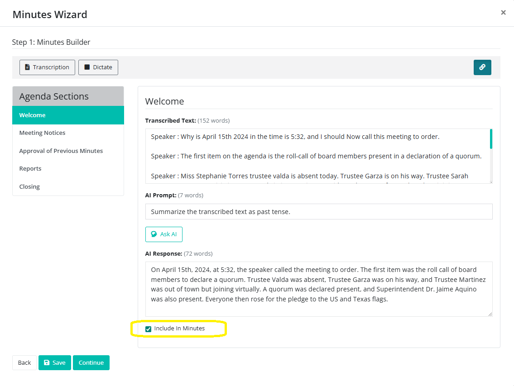
Repeat this process for other agenda sections as needed before clicking continue.
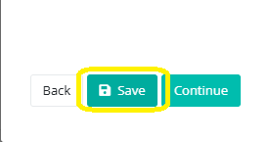
Tip: Click Save at any time to ensure your progress is stored.
Step 6: Finalize Your Minutes
Once you’ve added all sections, click Continue.
Step 7: Minutes Options: Add Extra Details
On the next screen, you can choose whether to include:
- Attendees
- Motions
- Tasks
Tick any that you want to include.
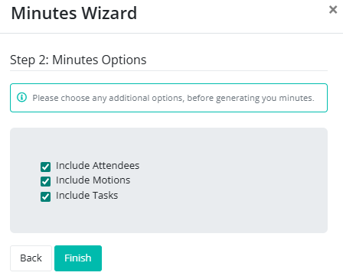
Click Finish.
Your meeting minutes will then be generated and can still be edited as normal.
Important: Resetting the minutes will clear the document completely.