
Auto Minutes
BoardCloud's Auto Minutes feature records and transcribes your meeting, then uses the meeting information to automatically create a formal, almost-ready minutes document. This significantly reduces the time and effort required to prepare minutes for distribution to meeting attendees.
Auto Minutes combines the following information:
- The meeting agenda
- Meeting attendees and their designations
- Motions and votes taken during the meeting
- Tasks assigned during the meeting
- The meeting transcript
This information is combined to create a complete draft of your meeting minutes.
To learn more about BoardCloud's Auto Minutes, see the Auto Minutes feature page.
Before You Begin
To use Auto Minutes, you must:
- Create a virtual meeting in BoardCloud using Microsoft Teams or Google Meet.
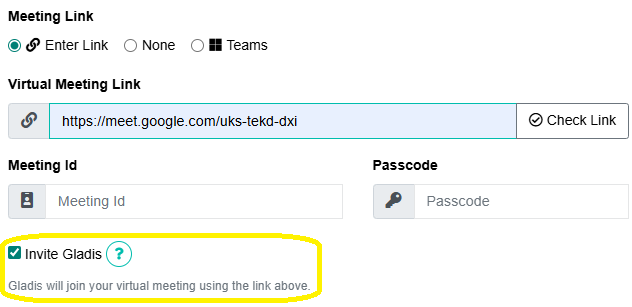
- Invite Gladis, BoardCloud's meeting bot, to the meeting by adding that link to the link box.
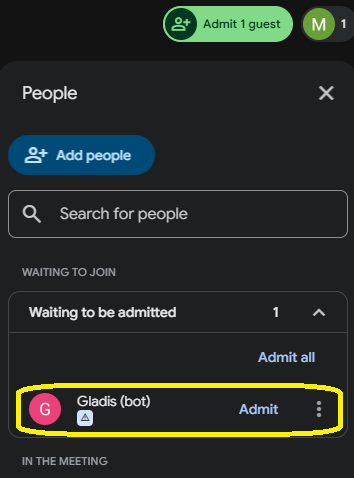
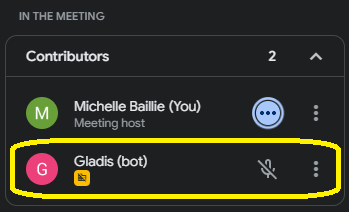
- Admit Gladis from the waiting room when she joins the meeting.
Important: Gladis must be admitted to the meeting before she can record and transcribe it. If she is left in the waiting room, she will be unable to perform her job.
Getting Started with Auto Minutes
Meet Gladis, BoardCloud's meeting bot.

When you create a virtual meeting in BoardCloud, you can choose to have your meeting via Microsoft Teams or Google Meet and provide the meeting link. You will then have the option to invite Gladis to attend.
Once invited, Gladis will:
- Join the meeting at the scheduled time using the meeting link provided.
- Record the meeting.
- Automatically produce a transcript of the meeting, which will be available on your Transcriptions page.
- Generate draft minutes using the meeting transcript, agenda, attendance list, voting results, and tasks assigned during the meeting.
When you return to the meeting overview, Gladis will appear in the list of meeting attendees. This confirms that Gladis has been invited to attend the meeting and will automatically perform the actions listed above.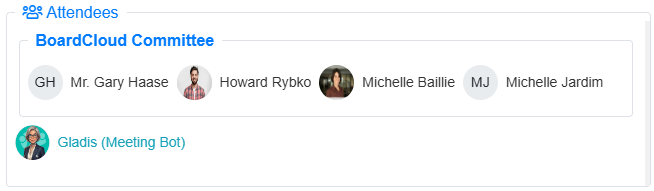
Reviewing Your Auto-Generated Minutes
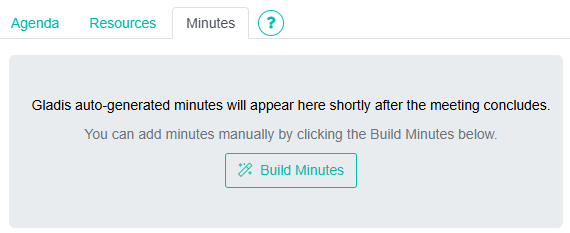
After the meeting has concluded, go to the Minutes tab on the meeting page. A message will indicate that your auto-generated minutes will appear shortly.
You can still create minutes manually at any time by selecting Build Minutes.
After a few minutes, your completed draft minutes will appear in the Minutes tab. You will also receive an email confirming that your minutes have been created.
You can then use the Minutes Editor to:
- Review and edit the generated content.
- Make any necessary corrections or additions.
- Customize the font and formatting of your minutes.
Once you have reviewed and finalized the minutes, they are ready to be distributed to your meeting attendees.