Creating a Task from a Meeting
Creating a Task from a Meeting
It’s easy to add a task directly from the meeting where it was discussed. This helps you to quickly assign it to the right people and keep everything linked to the correct agenda item.
Only an admin can create and delete tasks. This option will not be available for members.
To create a task from a meeting:
- Open the Meeting:
Click on the meeting to which you want the task to be linked. - Add a Task:
Scroll down to the agenda section, located just below the meeting overview. Click the Add Task button, it's the icon with a square and a check mark, found directly beneath the Minutes tab. You can also use the 3 dots (kebab) to add a task.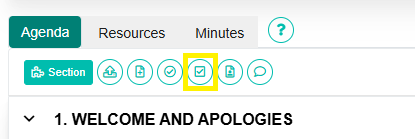
A task creation window will appear. It will look like the image below:
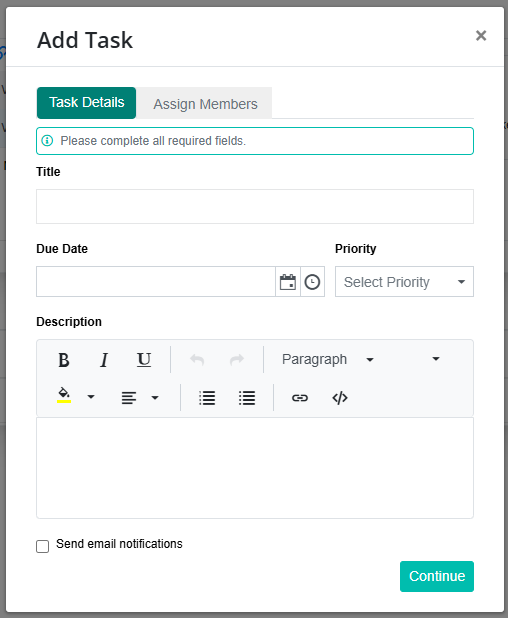
- Enter Task Details:
Title: The task title is the short, descriptive name of the task. It should clearly summarize what needs to be done, helping board members or assignees quickly understand their responsibilities at a glance. This is required, and you won't be able to create a task with an empty title.
Due Date : This is the date by which the task should be completed. It helps members prioritize their work and stay aligned with board or committee timelines. It’s not strictly required, but if left blank, the field will remain empty.
Due Time : The due time is the exact time of day by which a task is expected to be completed. It works alongside the due date to ensure clarity, especially when deadlines are time-sensitive. It’s optional, but if not set, the field will remain empty.
Priority : The priority level indicates how important or urgent a task is. It helps users and administrators focus on what needs attention first, especially when there are multiple tasks assigned. There are four levels of priority for tasks - None, Low, Medium, and High. If no priority is selected, the task will default to Medium priority.
Description : This field is optional, but it's good practice to include more detail to help members understand what is expected of them, especially if the task title is vague. You can use formatting options like highlights and bullet points to make the description clearer and more engaging.
Send Email Notifications: Tick this box to notify assigned members by email. This is the primary way to ensure they are alerted about the task. - Assign Members:
Click Continue (bottom right of the task creator window). The Assign Members section will appear. Select the members you want to assign to the task. You have to select at least one member to assign the task to.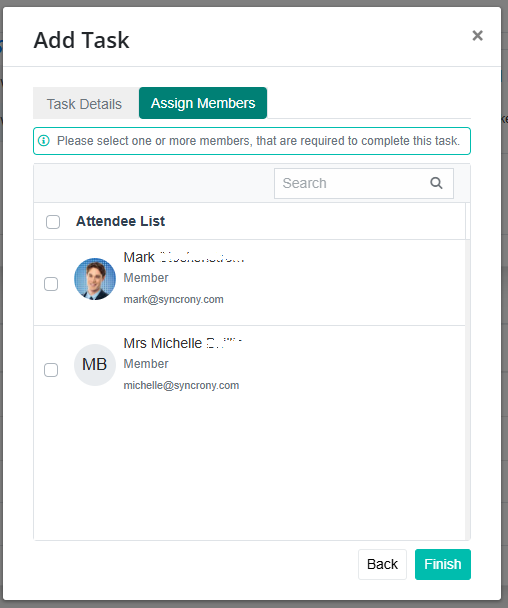
- Finish:
Click Finish to save and create the task.
Your task will now appear at the bottom of the agenda section. You can drag and drop it under different agenda headings if needed.
Once a task is added, you cannot edit it, other than adding a comment.